
Multiple miking setups explore the possibilities of organ and rotating speaker
By Dave Martin
I’ve always loved the sound of a Hammond organ. A B3 and a Leslie tone cabinet can produce a greater variety of sounds than any other analog instrument, including the electric guitar (which depends on added effects for most of the more outrageous sounds). The monster rock tones created by Jon Lord on the old Deep Purple records, Jimmy Smith’s swinging jazz approach, and the mighty B3 on Aretha Franklin’s gospel records—it’s all great.
Hammond and Leslie
The Hammond tone-wheel organ was introduced by Laurens Hammond in 1935 and the Leslie cabinet was built by Don Leslie in 1940. “Leslies” are speaker cabinets made of solid wood with “louver” slots to let the sound out top and bottom, and with rotors that spin and throw the sound out into the room.
Don Leslie offered his design to the Hammond Organ company, but Laurens Hammond didn’t like the sound of his organs through a Leslie cabinet. In fact, he was so against it that for a number of years, Hammond dealers were prohibited from also selling Leslie cabinets (the prohibition was, naturally, widely ignored).
Despite Hammond’s dislike (or perhaps because of it), by the ‘50s what most people considered to be the sound of the Hammond organ included that of a Leslie cabinet. The Leslie with its spinning sound managed to turn stuffy parlors and bars and small chapels into illusionary halls and cathedrals—the moving sound had something majestic about it. And it still does.
Combinations
Most enthusiasts consider the ultimate Hammond/Leslie combination to be a B3 and a Leslie 122, but like so much related to this instrument, that ain’t necessarily so. With Hammonds, for instance, the only difference between the B3 and C3 is the cabinet—all the electronics are the same. Other organs, like Hammond’s A100 and the RT3, all have the characteristic sound of a B3. And other models, like the B2 and C2, are essentially the same except for percussion, which can be added with an aftermarket box like that made by Trek II. Even some of the spinet models like the ‘L’ and ‘M’ series organs, though smaller, can achieve some of the characteristic Hammond organ sound.
Leslie cabinets are kind of the same way—dozens of models have come and gone. Whatever the specific model, most Leslies you’ll encounter share a general concept—that there is a rotating high-frequency horn (the upper rotor) as well as a low-frequency speaker mounted above a rotating drum that deflects the sound outward. The high and low frequencies are divided by an 800 Hz crossover. If you look into the top of a Leslie cabinet, there are two horns on the upper rotor, but only one is pushing out the sound of the high-frequency driver—the other is a dummy providing a counterweight.
 Though the 122 and 147 are the best-known Leslies, some of the others are excellent. And like the Trek II Percussion add-on for the organ, modifications are available for Leslies that make the original design of the cabinet less important—or at least less easy to figure out.
For example, my Leslie is a Model 21H with a 32H series amplifier. The 21H was a single-speed Leslie with an electrodynamic 15″ speaker, which was either fast or off. An electrodynamic speaker doesn’t have a permanent magnet like modern speakers do, it operates only when direct current (DC) is supplied to the electromagnet. That seems odd today, but was a common approach to loudspeaker design before the development of the Alnico permanent magnet.
Nevertheless, my 21H is a predecessor of the 122, with similar cabinet shape and identical top rotors. It’s been modified, though; Tom “Murph” Wanca from Nashville Pro Hammond installed an RTC Logic MCV2 card, which changes the 21H from a single-speed to a two-speed Leslie. In some ways, the 21H is identical to the later 122, while in other ways (the electrodynamic speaker is one example), it’s not at all similar.
Miking experiment
Anyway, just as there are dozens of variants on the classic Hammond/Leslie combo, there are many, many ways to record it, and none of them is wrong. Different microphone setups emphasize different aspects of the tone, so part of the fun with organ recording is deciding which aspects you want to accent. We decided to set up a controlled experiment to see just how much difference microphone choice and placement make in the recorded sound.
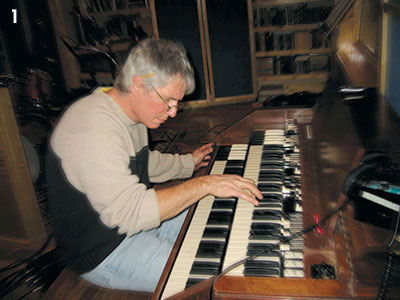
 The instrument was my 1957 Hammond C3, attached to the modified 21H. (We had another Leslie, a 122, available, but the 21H sounded much better.) Murph, an excellent organist as well as an excellent organ technician, played the C3 for the experiment. That’s him in the first photo.
The Leslie was set up more or less in the middle of the tracking room, with a couple of gobos used as reflectors approximately 4 to 5 feet from either side of the cabinet. One gobo was set up to minimize any resonance from the drum set, while the other was set up for the sake of symmetry. The top and bottom baffles were removed from the back of the cabinet so that both the upper and lower rotors were visible, and the cabinet was miked from the back, which is generally the way that Leslie cabinets are used on stage and in the studio.
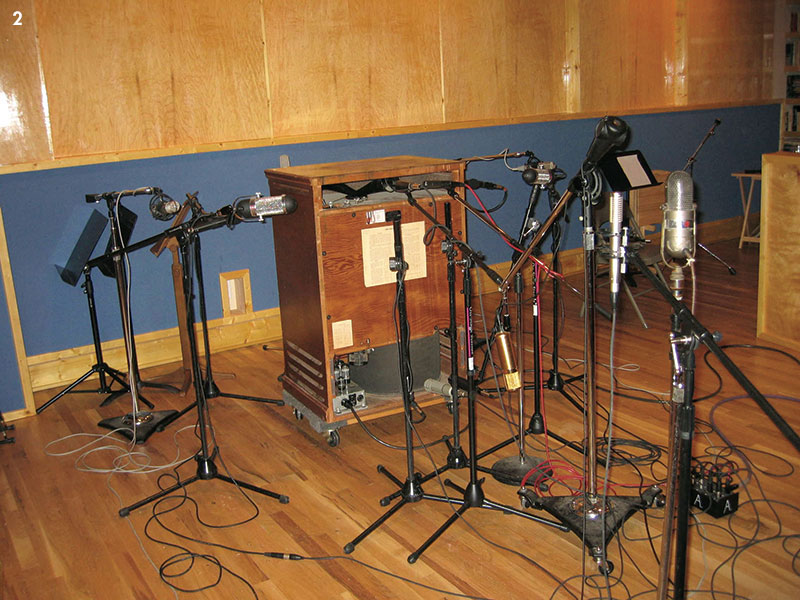
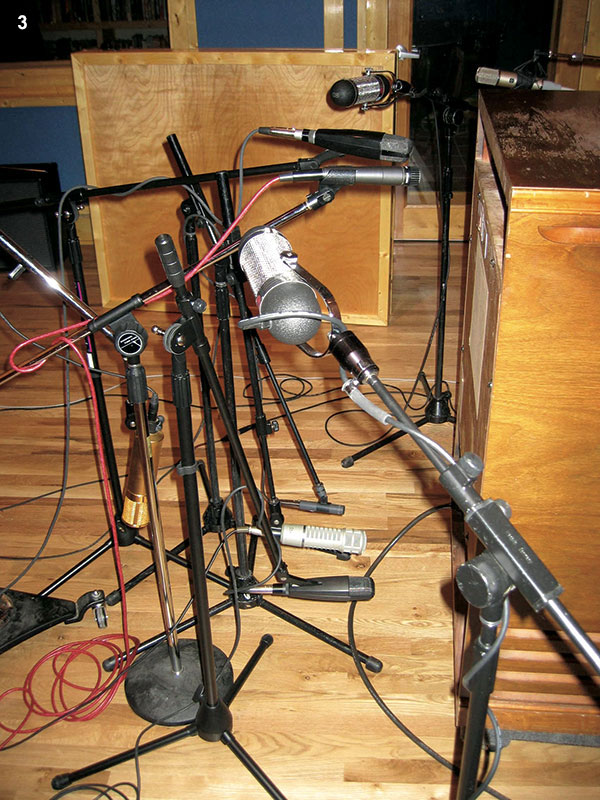
Rather than try to have Murph play the same thing many times, we elected to set up a bunch of mics in a variety of positions and effectively record eight different mic setups at one time. This was the only method that we could think of that made mic choice and positioning the only variables. All of the mics were plugged into the onboard preamps on my D&R Cinemix and routed through the internal busses to their respective tracks, eliminating differences that could have been caused by different kinds of outboard preamps. (See photos 2 and 3 for a glimpse of the carnage.)
The tracks were recorded to my studio’s Pro Tools rig at 24 bits and 44.1 kHz, with each mic going to its own channel—15 in all. To create each of the examples discussed below, we merely muted the channels we didn’t need for that example.
Placements
I recorded a number of different mic placements, as shown in the illustrations in Figure 4. Click on the links to hear the MP3 files.
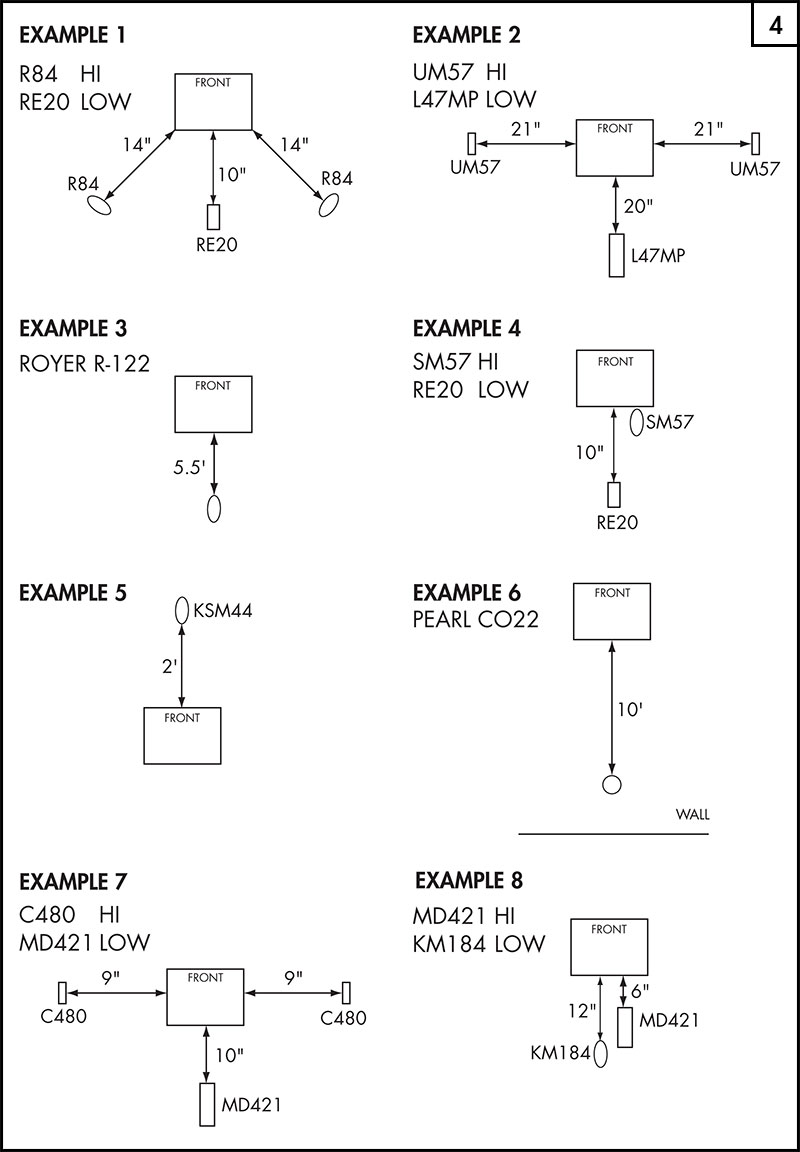
Example 1: A pair of AEA R84 ribbon mics were placed about 14″ out from the corners of the cabinet and pointed at the upper rotor, with a spread of approximately 90 degrees. An Electro-Voice RE20 was about 10″ away from the low rotor.
Example 2: This is an example of the widest spread, with a pair of Neumann UM 57 mics placed on either side of the cabinet, approximately 21″ away from the louvers. A Lawson L47 MP was placed at roughly the same distance, 20″, from the low rotor. Placing the mics on either side of the cabinet gives a distorted view of the Leslie’s speed; because there’s only one active horn, 180 degree miking makes the Leslie sound like it’s going twice as fast as it actually is, because each side picks up the sound at a different time.
Example 3: A simple mono mic placement, a Royer 122 ribbon mic 5.5′ away from the Leslie. This is really close to what the Leslie sounded like in the room. The Royer has a Figure-8 polar pattern (as most ribbon mics do) so in addition to the direct sound into the front of the mic, reflected sound from the rest of the room was entering the back of the Royer.
Example 4: A classic setup: a Shure SM57 very near the top rotor, and an RE20 on the bottom—the same RE20 that was used for Example 1.
Example 5: Another single-mic setup: a Shure KSM44 set to a cardioid pattern placed about 2′ away from the Leslie. This mic was the only one placed in front of the cabinet instead of behind it.
Example 6: This is really an example of miking the room rather than the cabinet. This is a Pearl CO22, an omnidirectional microphone. The CO22 was 10′ away from the Leslie, just a couple of feet off the opposite wall of the studio. At this distance, it’s a little roomy for my taste, but is nevertheless a representation of the sound from that distance away.
Example 7: A number of engineers prefer the sound of small-diaphragm mics for the top rotor, so in this example we placed AKG C 480 mics at 180 degrees on the top rotor, placed 9″ from the cabinet, and a Sennheiser MD 421 10″ away from the low rotor.
Example 8: A conversation with Nashville engineer Lynn Fuston revealed that he prefers to use a dynamic, like a Sennheiser MD 421, 6″ from the top rotor and a small diaphragm condenser—specifically, a Neumann KM 84—on the bottom. Since I didn’t have an 84 available, I tried it with the newer KM 184 on the low rotor, approximately 12″ away.
What else?
Are there other placements that we could have tried? You bet. The setups detailed here are certainly not the only possible ones, nor are the mic choices the only ones that could have been used. What options do you have, if you’re not overly fond of the examples given here? Well, you can change microphones, change mic placement, change the recording environment, and (lest we forget) change the drawbar settings of the organ.
Changing mics
If you think a ribbon mic is too dark, try dynamic or condenser mics; conversely, if you think that the organ sounds too bright with a condenser mic, go to a dynamic or a ribbon. And there’s no rule that says that you have to use large-diaphragm condensers; at least one engineer I know prefers AKG 460 mics, a fairly common small-diaphragm condenser mic, on the top rotor. I’ve already mentioned that some folks prefer to use condensers like Neumann U 67 or U 87 on the bottom rotor instead of dynamic mics, and others like ribbons.
Changing placement
Though the tendency these days is to close-mic everything, there’s no rule that says you have to do so. A time-honored Leslie miking method includes using a pair of Neumann U 67 mics about 5 feet in front of the cabinet and 10 feet apart (with the resulting tracks panned left and right). But if you do close-mic, you may find that you pick up too much wind noise from the rotors (when they’re spinning fast). Windscreens can help with this problem, as can moving the mics either back from the cabinet or up or down far enough to get them out of the wind generated by the rotors.
An often overlooked possibility is also to change the placement of the tracks in the mix’s stereo field. Just because several of these setups were recorded in stereo, that doesn’t mean that you’re thereby required to pan the stereo tracks hard left and right. To put the organ more to one side, try panning one track straight up and the other one to either the left or the right. Or try panning the tracks to 10:00 and 2:00 instead of hard left and right. And don’t forget that those setups that have one high mic and one low mic can be panned with the high on one side and the low on the other…
Changing the environment
When nothing else is working, you may also consider changing the acoustics around the Leslie. This can be done either by putting gobos around the cabinet (or something that works in the same manner as gobos) or by putting the Leslie in another location. Gobos, which are generally reflective on one side and absorptive on the other, can be used to dramatically change the sound of the Leslie in the room.
You can also simply move the Leslie to another location in the room if you don’t like the sound where it is. (My Leslie sits on top of a furniture dolly to make moving it around easier.) Typically, Leslies are placed against a wall like the furniture that they are; moving into the middle of the room changes the sound quite a bit. Another option is to move the Leslie into a corner; if you’re really into experimentation, try putting the Leslie into the corner at an angle so that the back of the cabinet faces into a corner. Then place a single mic back there.
If there is any rule for miking Leslie cabinets, that rule is to do whatever works.
Dave Martin would like to thank Tom “Murph” Wanca for playing the organ, Lynn Fuston for the loan of the Royer, and Carolyn Martin for the emergency trip to pick it up.